

Don’t know how to take screenshots on your mac, Worry not, We will show you various ways by which you can take screenshots on your mac, read the guide below to know more about taking screenshots on mac.
Table of Contents
Shortcuts Key’s To Take Screenshot’s On Your Mac
Also Read: Sound Issue Fixed In Windows 10
1.Take Screenshot Of Entire Screen
Also Read: How To Take Screenshot In Windows 10

Just press Shift-Command-3. You can hear a camera click sound When you take a screenshot, Your screenshot will appear as a thumbnail in the bottom-right corner of your screen. If you leave it there, it will automatically save to your desktop by default.
2.Take Screenshot Of Small Portion Of Screen
Also Read: Support Assist Unexpected Error Fix

- If you want to take a screenshot of a portion of your screen, press Shift-Command-4. This will turn your pointer into a crosshair. Move it to where you want to start the screenshot click and drag to select an area and release your trackpad or mouse.
- You can press the Escape key to cancel before releasing your trackpad or mouse if you’ve changed your mind.
3. Take a Screenshot Of A Window
Also Read: Pin Is Not Available In Windows 10
- To take a screenshot of a window, press Shift-Command-4 and then the Space bar. This will change the pointer to a camera. Move the camera over to the window
or menu you want to capture and look for the highlight to confirm that it’s selected. Then, click your trackpad or mouse to take the screenshot. Your screenshots will be saved to your desktop. - If you also hold Control as you use these shortcuts, they’ll save to your clipboard instead.
Using Screenshot ToolBar To Take Screenshots
Also Read: Connect Wireless HP Printer With Computer
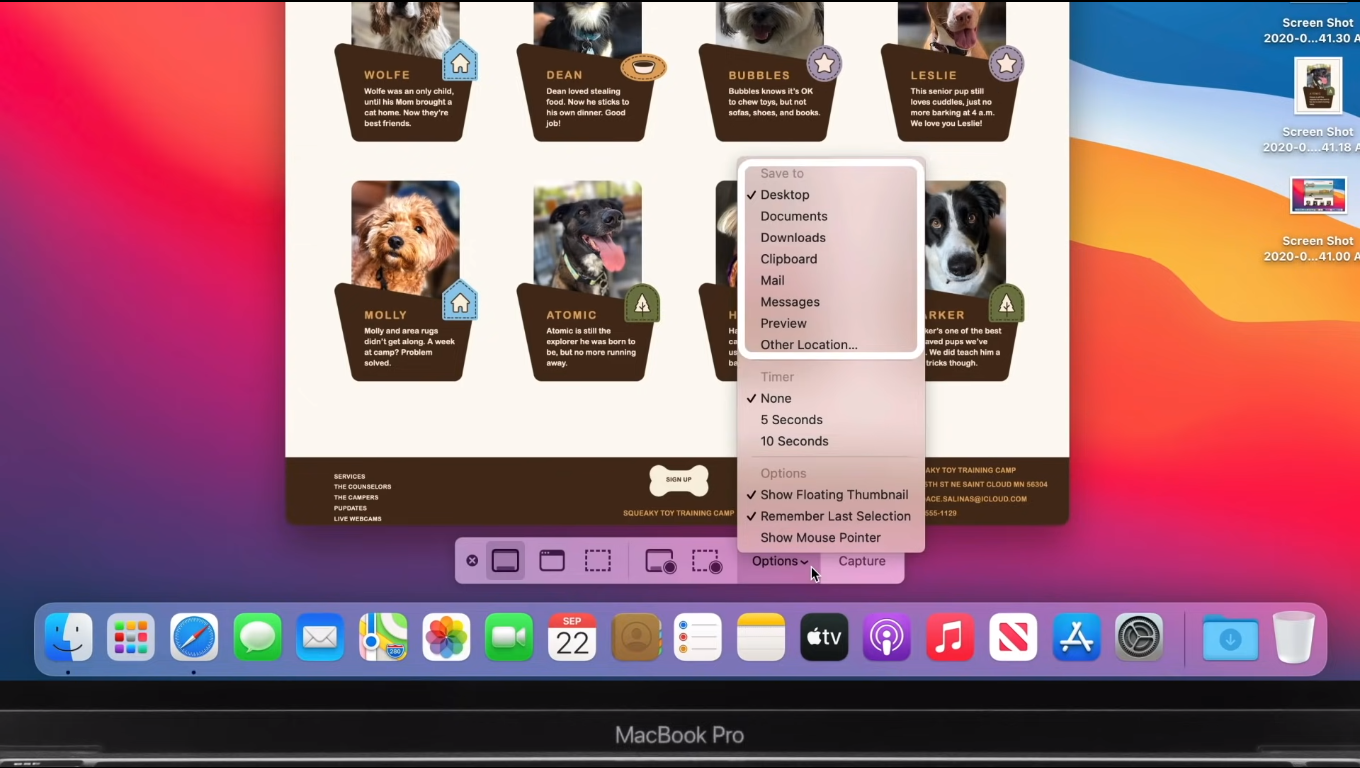

- You can also use the Screenshot toolbar in addition to keyboard shortcuts. The Screenshot toolbar is useful for things like recording your screen and changing your screenshot settings. To open it, press Shift-Command-5.
- By default, the tools will appear at the bottom of the screen, but you can move them around if you like. You’ll find the controls for taking a screenshot on the left-hand side.
- You can choose to capture the entire screen, A single window or a portion of the screen. You’ll also find tools for recording your entire screen or recording a portion of the screen. To view your customization options, click Options. You’ll find useful settings and features, like setting a screenshot timer or changing your save location.
Stay Tuned For More!!
To get more related content related to Entertainment, Technology, Windows Fixes, Do-Follow Tremblzer. On Google News